
- Understanding Gel Nails
- The Benefits of Gel Nail Polish
- The Application Process
- Preparing Your Nails
- Applying the Gel Polish
- Nail Art Techniques
- Maintenance Tips for Gel Nails
- Affordable Gel Polish Options
- Brand Recommendations
- DIY Gel Nail Kits
- The Cost of Gel Nails
- Professional Application
- DIY Costs
- Conclusion: Stunning Looks on a Budget (Incomplete: max_output_tokens)
Unhas de Gel: Stunning Looks with Affordable Gel Polish
Unhas de Gel, or gel nails, have become increasingly popular among beauty enthusiasts and nail art lovers due to their stunning aesthetics and long-lasting finish. With the rise in demand for this trend, many individuals are looking for ways to achieve beautiful nails without breaking the bank. This comprehensive guide will dive into the world of gel polish, exploring its benefits, application process, maintenance tips, and cost-effective options.
Understanding Gel Nails
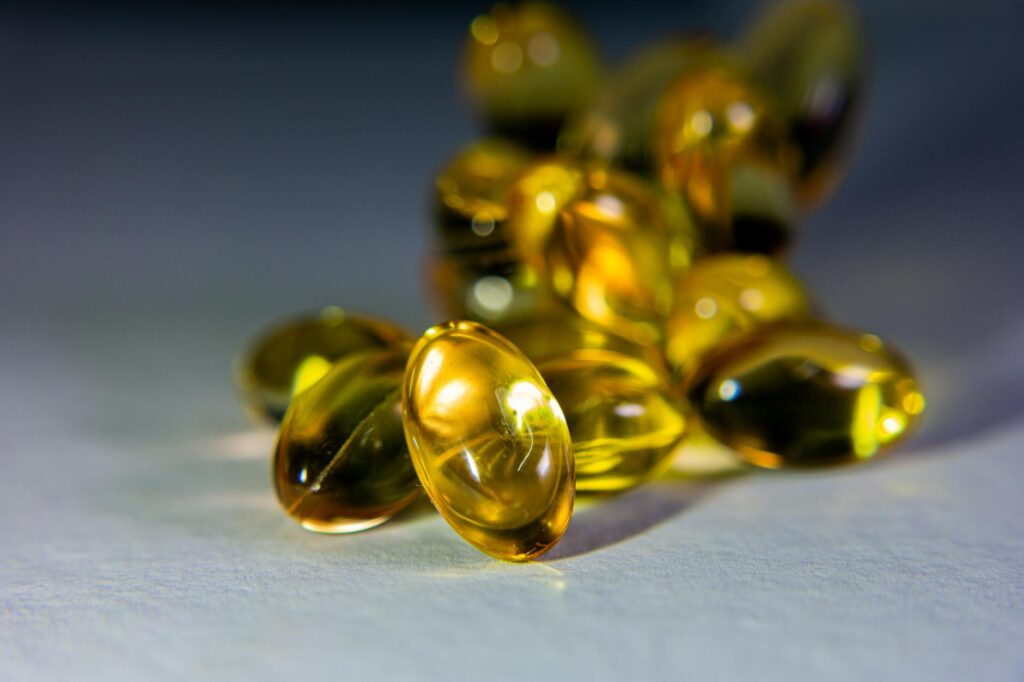
Gel nails are a type of manicure that uses gel-based polish to create a durable and glossy finish. Unlike traditional nail polish, gel formulations require a curing process involving UV or LED light to ensure that the polish hardens and adheres properly to the nail. This unique process allows for vibrant colors, intricate nail art, and an impressive lifespan of up to two weeks or more.
The Benefits of Gel Nail Polish
One of the main attractions of unhas de gel is the myriad benefits that come with them:
1. Durability: Gel polish is known for its strength and resistance to chipping. This makes it more suitable for individuals with busy lifestyles who want to keep their nails looking pristine.
2. High Shine: The curing process gives gel nails a glossy finish, achieving a salon-quality look that’s hard to replicate with traditional nail polish.
3. Quick Drying Time: Once applied, gel polish hardens quickly under UV or LED light, eliminating the long waiting times associated with regular nail polish.
4. Vibrant Colors: Gel nail polishes come in a rich variety of colors and finishes, from matte to glitter, making it easy to find the perfect shade for any occasion.
5. Less Odor: Gel nail products often have a less potent smell compared to traditional polishes, making the overall application process more pleasant.
The Application Process
Getting the perfect unhas de gel involves an intricate process that, while detailed, is straightforward with a bit of practice. Here’s how to do it step-by-step:
Preparing Your Nails
1. Start with Clean Nails: Begin by washing your hands and ensuring your nails are free of any oils or residues.
2. File and Shape Your Nails: Use a nail file to shape your nails according to your desired style. Popular shapes include square, round, and almond.
3. Push Back Cuticles: Carefully push back your cuticles with a cuticle pusher. This step ensures that the gel polish adheres well at the base of the nail.
4. Buff the Nail Surface: Lightly buff the surface of your nails to create a rough texture, which helps the polish bond better.
Applying the Gel Polish
1. Apply a Base Coat: Start with a gel base coat designed specifically for gel polishes. Apply a thin layer, ensuring you cover the entire nail.
2. Cure Under UV/LED Light: Place your nails under a UV or LED lamp as per the manufacturer’s instructions to cure the base coat. Typically, curing times range from 30 seconds to 2 minutes.
3. Add Color Layers: Apply one or two coats of your chosen gel color, curing each layer. Thinner layers work better, as they cure more effectively.
4. Finish with a Top Coat: Finally, seal your design with a gel top coat to enhance shine and durability. Cure once more to complete the process.
5. Wipe off the Sticky Layer: Use a lint-free wipe and rubbing alcohol to remove the sticky layer that typically forms after curing the final coat.
Nail Art Techniques
Once you have mastered the basics, you can explore various nail art techniques to elevate your unhas de gel:
– Ombre Effect: Blend two colors for a gradient effect.
– Nail Stamping: Use stamping tools to transfer intricate designs.
– Foil and Flakes: Incorporate metal foils or glitter flakes for added texture.
– Freehand Art: Experiment with brushes to create original designs.
Maintenance Tips for Gel Nails
While gel nails are durable, they require care to maintain their stunning appearance:
1. Moisturize: Keep your nails and cuticles hydrated with a good cuticle oil. This prevents cracking and dryness.
2. Avoid Excessive Water Exposure: Prolonged exposure to water can weaken gel polish. Wearing gloves while washing dishes can help.
3. Be Gentle: Avoid using your nails as tools for opening packages or scratching surfaces to prevent lifting or chipping.
4. Regular Maintenance: Schedule regular appointments for fills or reapplications, especially if you notice any lifting around the edges.
5. Proper Removal: Never peel off gel polish. Soak a cotton ball in acetone, place it on the nail, and wrap it with foil. After a few minutes, gently scrape off the polish.
Affordable Gel Polish Options
Despite the luxurious feel of unhas de gel, there are various budget-friendly options for gel polishes that don’t compromise quality. Here are some affordable brands worth considering:
Brand Recommendations
1. Essie Gel Couture: Known for its wide color range and easy application, this line provides a gel-like finish without the need for a light.
2. Sally Hansen Miracle Gel: Offers an impressive selection of shades that last up to 14 days. This brand is easily accessible and widely praised.
3. Gelish Soak-Off Gel Polish: While it may be pricier than drugstore brands, Gelish offers durability and vibrant colors that make it worth considering.
4. Color Club Gelous: This brand is known for its affordable price point and variety, making it a great option for nail enthusiasts on a budget.
5. Modelones Gel Polish: An excellent option available in sets, Modelones offers creative colors at a fraction of salon prices.
DIY Gel Nail Kits
If you’re looking to save even more, consider investing in a DIY gel nail kit. Many kits come complete with a lamp, base and top coats, and a selection of colors:
– Mylee Gel Nail Kit: Includes a professional LED lamp and a range of colors, perfect for beginners.
– Gellen Gel Nail Polish Starter Kit: This comprehensive kit provides all the essentials for achieving salon-quality nails at home.
The Cost of Gel Nails
When considering gel nails, the cost can be a determining factor. Here’s a breakdown of potential expenses involved:
Professional Application
Depending on areas and salon reputations, professional gel manicure services can range from $30 to $100. Factors affecting the pricing include:
– Location: Big cities often have higher prices.
– Salon Type: Upscale salons may charge more than local nail bars.
– Added Services: Nail art, extra treatments, or specialized products can increase costs.
DIY Costs
Doing it yourself is often more cost-effective in the long run:
– Initial Investment: A quality UV or LED lamp can range from $30 to $100. Professional-grade gel polishes might cost $10 to $20 each.
– Ongoing Costs: After the initial setup, maintaining a DIY gel manicure may cost approximately $5 to $15 for additional colors and supplies.